Proof the Yeast. In a large bowl of the stand mixer, with the dough hook attachment, or in a large bowl with a wood spoon, whisk together the warmed soy milk (or other plant based milk) with the yeast and a pinch of sugar. Set aside for 5 to 10 minutes to allow the yeast to activate.
Combine the Ingredients. Add the remaining ingredients to the bowl with the yeast mixture. This includes the bread flour, sweet potato, sugar, canola oil, and salt. Begin to mix on low speed.
Knead the Dough. When the dough has formed into a shaggy dough ball, you can increase the speed to a medium-low speed. Knead for 8 to 10 minutes or until the dough is tacky but no longer sticky. You can add a few more tablespoons, one spoonful at a time, to the dough so that it doesn’t stick to the sides of the bowl.
First Rise. When the dough has finished kneading, remove the dough from the bowl and gently tuck it into a dough ball. Lightly oil the bowl with some extra oil and set the dough ball back into the oiled bowl. Let the dough rise in a warm spot for about an hour, or until the dough is doubled in size. Make sure to cover the bowl with a clean kitchen towel or piece of plastic wrap to protect the dough while rising.
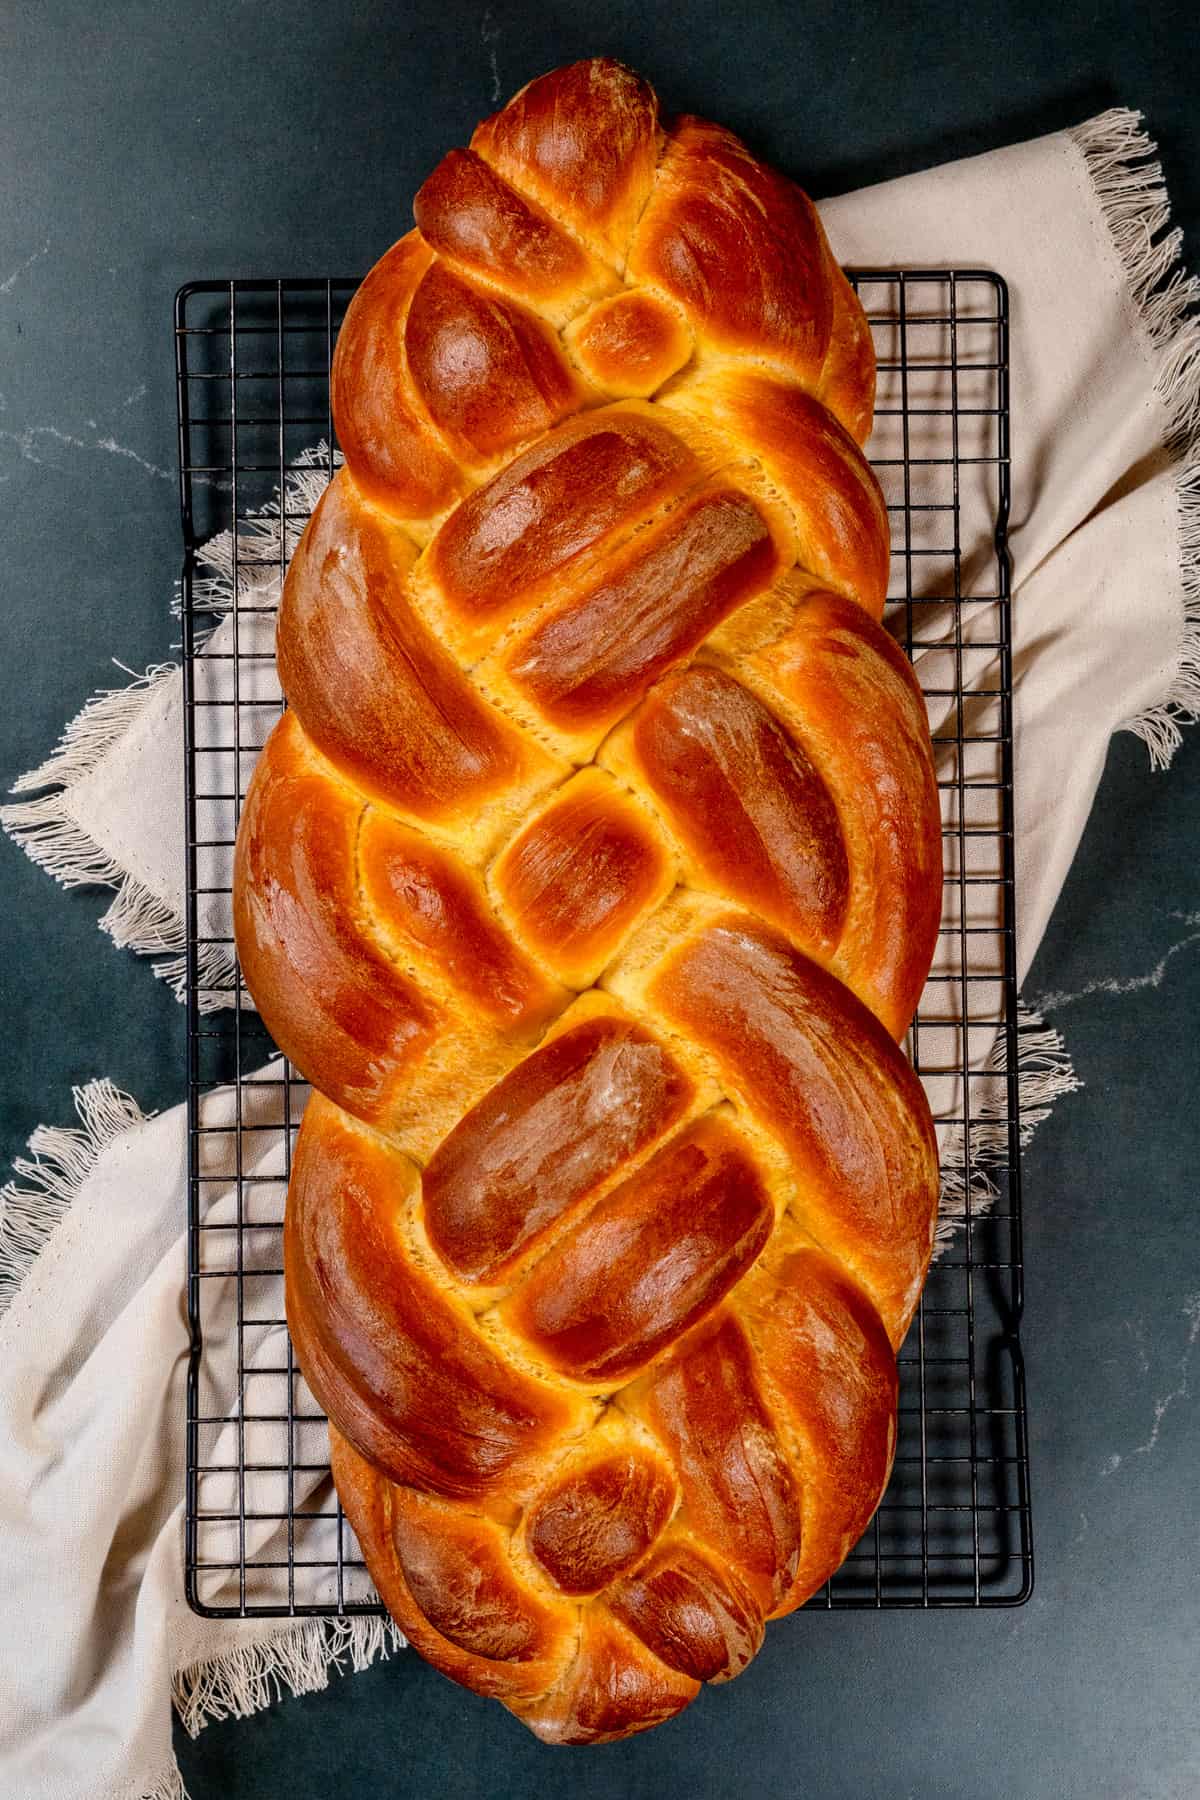
Shaping and Braiding. Now it’s time to shape and braid the dough. You can do so in any way, either making a 3- 4- or 6-strand braid, making a braided round loaf, or simply dividing the dough into two loaves and placing them in two separate bread loaf pans. For detailed instructions on how I braid my 6-strand braid, please see the post above for photo references.
Second Rise. Let the dough rise again on parchment paper on a baking sheet, lightly covered with a clean towel for another 30 minutes while the oven preheats.
Preheat the oven to 375°F/190°C. Make sure the oven rack is set to the lower third of the oven to prevent the bread from burning.
Bake. Brush the challah bread with either plain plant based milk, or a combination of apricot jam and water. Sprinkle with sesame seeds or poppy seeds if desired. Bake for 35 to 40 minutes, making sure to check on the bread at 20 minutes and 30 minutes. Do NOT open the door. Simply check to make sure the bread is not browning too quickly. If it is browning, cover lightly with a piece of aluminum foil. The bread is done when it has achieved a dark golden color and has reached an internal temperature of at least 194°F/90°C.
Cooling. Remove the bread from the oven and let it cool on a wire rack for at least one hour before slicing and serving. Enjoy!